Best time of day to shock pool

why we need to shock the pool?

Shocking a pool is recommended for the following purposes:

  • 1. Alleviating Micro-contaminants and Organic Debris Buildup:
  •    – To mitigate the accumulation of tiny contaminants and organic matter in the water.
  • 2.Eliminating Bacteria, Both Harmless and Harmful
  •    – To eradicate various types of bacteria, including pathogenic ones, present in the pool.
  • 3. Neutralizing Chloramines (Combined Chlorine Molecules):
  •    – To break down chloramines, which are responsible for pool odors and can cause eye and skin irritation.
  • 4.*Eradicating Algae Growth:
  •    – To effectively eliminate and prevent the growth of algae in the pool water.
  • 5. Treating Turbid (Cloudy) Pool Water:
  •    – To clarify the water and restore its clarity when it becomes cloudy or hazy.
  • 6. Managing Severe Contamination Events:
  •    – To respond to major contamination incidents like storms or fecal contamination that require extensive treatment.
  • Shocking the pool serves these purposes to maintain water quality and safety for swimmers.

Best chemicals to shock a pool  

When considering the shock treatment for your swimming pool, various chemical options are available. The choice of the most suitable chemicals depends on your pool’s specific requirements, and it’s essential to adhere to manufacturer instructions while maintaining the proper pool chemistry. Here are some common chemical choices for pool shocking:

1. Calcium Hypochlorite: This is a widely used option for pool shocking. It is available in granular form and dissolves quickly. Calcium hypochlorite provides a concentrated source of chlorine, effectively eliminating algae, bacteria, and organic contaminants. It can also raise calcium hardness levels in the pool, which may be advantageous in certain situations.

2. Sodium Dichlor: Sodium dichlor is a stabilized chlorine shock that has increased resistance to sunlight degradation. It is convenient because it can serve both as a regular maintenance chemical and a shock treatment. It dissolves rapidly and has minimal impact on the pool’s pH.

3.Potassium Peroxymonosulfate (Non-Chlorine Shock): This non-chlorine shock is adept at oxidizing and breaking down organic contaminants without introducing additional chlorine into the pool. It is an excellent choice for chlorine-sensitive situations, indoor pools, or those aiming to reduce chlorine usage.

4. Lithium Hypochlorite: Lithium hypochlorite is a fast-dissolving shock treatment that elevates chlorine levels in the pool, efficiently eradicating bacteria and algae. It has the advantage of not significantly affecting calcium hardness levels, making it suitable for areas with hard water.

5. Potassium Monopersulfate (Non-Chlorine Shock):Similar to potassium peroxymonosulfate, this non-chlorine shock is employed to oxidize contaminants without introducing chlorine. It is a suitable option for maintaining water clarity and quality.

6. Hydrogen Peroxide: Some pool owners consider hydrogen peroxide as a non-chlorine shock alternative. It functions by oxidizing contaminants and assisting in preserving water clarity. Nevertheless, it is less effective at sanitizing water compared to chlorine-based shock treatments.

It is crucial to select the most appropriate shock treatment based on your pool’s particular needs, existing water chemistry, and any potential sensitivities or allergies among pool users. Always adhere to the manufacturer’s recommended dosing and application instructions, and regularly test your pool water to maintain the correct chemical balance. Additionally, ensure proper pool circulation and filtration to evenly distribute the shock treatment throughout the water.

Best time to shock a pool

The best time to shock a pool is typically in the evening or at night, just after the sun has set. Here’s why:

1.Sunlight Degradation: Chlorine, whether in the form of shock or regular pool sanitizer, can break down when exposed to sunlight. By shocking your pool in the evening or at night, you minimize the chlorine’s exposure to sunlight, allowing it to work more effectively and last longer in the water.

2. Less Pool Activity: Evening or nighttime is often when pool activity decreases. Fewer swimmers mean less disruption to the pool water during the shocking process. This allows the shock treatment to disperse evenly and work its way through the water without interference.

3. Optimal Circulation: Shocking the pool in the evening or at night allows the pool’s circulation system, including the pump and filter, to work at full capacity without interruptions. This ensures that the shock treatment is thoroughly mixed with the pool water and reaches all areas of the pool.

4. vernight Recovery: After shocking, it’s a good idea to leave the pool’s pump and filter system running overnight. This provides ample time for the shock treatment to work and for the pool water to circulate, helping to break down contaminants and restore water clarity.

5. Safety Concerns: Shock treatments can temporarily raise chlorine levels to levels that may not be safe for swimming. By shocking in the evening or at night, you can ensure that the chlorine levels have had time to dissipate and return to safe levels by the time you plan to use the pool again.

However, it’s essential to consider your specific circumstances. If evening or nighttime isn’t convenient for you, shocking the pool in the early morning can also be effective, as long as you allow adequate time for the shock treatment to work before swimming. Always follow the manufacturer’s guidelines for the specific shock product you’re using, and be cautious when handling pool chemicals to ensure safety.

How often should i shock a pool?

The frequency of pool shock treatments should be determined by factors such as pool use, weather conditions, and water quality. Here are some general recommendations:

1. Routine Maintenance: It’s typically a good practice to shock your pool every 1 to 2 weeks as part of regular pool maintenance, especially during active swimming seasons. This helps prevent the accumulation of contaminants, algae, and bacteria.

2.Heavy Usage: After occasions of high pool usage, such as large gatherings or increased swimmer activity, consider shocking the pool to address the added load and potential introduction of impurities.

3. Weather Influences: Following heavy rain, storms, or extended periods of hot and sunny weather, consider shock treatment. Rain can introduce organic matter, while intense sunlight can deplete chlorine levels.

4. Algae Concerns: If you observe signs of algae growth, like green or cloudy water, it’s crucial to shock the pool to eliminate the algae and restore water clarity.

5. Chloramine Issues: If you notice a strong chlorine smell or experience eye and skin irritation while swimming, it may indicate elevated chloramine levels (combined chlorine). Shocking the pool can help remove chloramines and enhance water quality.

6. Opening and Closing When preparing to open the pool for the season or close it for winter, including shock treatment as part of the process can help ensure a clean and well-maintained pool.

Always adhere to the manufacturer’s specific guidelines for the shock treatment product you use. Regularly test your pool water’s chemical balance, including chlorine levels, pH, alkalinity, and calcium hardness, to ensure a safe and comfortable swimming environment. Adjust your shock treatment schedule based on these test results and any visible indications of water quality concerns.

conclusion

In conclusion, maintaining a clean and safe pool involves proper shock treatments. Timing matters, with evenings or nights being optimal. Choice of chemicals is crucial. Shocking addresses contaminants, bacteria, and algae, improving water clarity and handling contamination incidents.

Pool shock frequency varies based on usage, weather, and water quality. Regular testing and maintenance are essential for a clean and inviting swimming environment.

Which Side Of A Solar Pool Cover Goes Down?

which side of pool solar cover best to place up or down

Are you getting confused between which side of a solar pool cover goes down ? don’t worry i am here to help you 

The simple answer is put the bubble side always down to get the best result. Because it  helps to float.

You probably heard that solar covers trap the sunlight and heat your pool but it’s not fully true.

In this article i am going to share you behind the solar pool and why you always put the bubble side down?

Why Your Solar Pool Cover Bubbles Should Always Be Facing Down?

As we know, there is air inside the bubble which prevents the pool cover from sinking in the pool. 

You might be thinking that many people say these bubble helps to heat your pool. But this is not ture.

Generally solar cover does not actually heat the pool it’s just gonna reduce the evaporation and keep the heat in your pool.

Swim University

Can you run pool pump with solar cover on?

No, as I already mentioned, solar covers only keep the heat in your pool. Running pump slowly slowly drains about your heat so it doesn’t make any sense to use solar cover while you turn on your pool pump.

Jandy vs Hayward| A Complete Pool Equipment Comparison

Jandy vs Hayward

You probably already know how important it is to have durable and effective pool equipment whether you already own a pool or are thinking about getting one. Jandy and Hayward are two well-known brands in the swimming pool equipment sector that have built a reputation for excellence and innovation.

In this in-depth analysis, you and I Alex , together  we will dive into the global market of pool accessories and examine the features and distinctions among Jandy and Hayward.

You will have a complete comprehension of how these two market leaders compare in a variety of areas at the conclusion of this article, enabling you to make an informed choice for your swimming pool needs.

Overview of Jandy vs Hayward

JANDYHAYWARD
Well-known for its high-quality goods, provides a variety of pool accessories and automation systemsThe product line from Hayward consists of automation systems, heaters, filters and pool pumps. 
They prioritize innovation and energy efficiency Titan in the pool equipment market with a long history that dates to the 1920s is Hayward Industries.
better swimming experience while minimizing their influence on the environment.take great satisfaction in producing robust and dependable equipment that makes maintaining pools easier and increases pool enjoyment.

Key characteristics

  • Versatility: Hayward is a well-liked option for homeowners as well as business pool owners due to its versatility in offering products that can accommodate an extensive variety of swimming pool sizes and types.
  • Innovation: Hayward has a history of inventing cutting-edge technologies, like the Hayward Turbo Cell technology, that boosts the effectiveness of salt chlorination systems.
  • Customer Support: This service is a priority for Hayward, and the company provides materials and support to pool owners so they can get the most out of their tools.

Pool Pumps: Janday VS Haywards

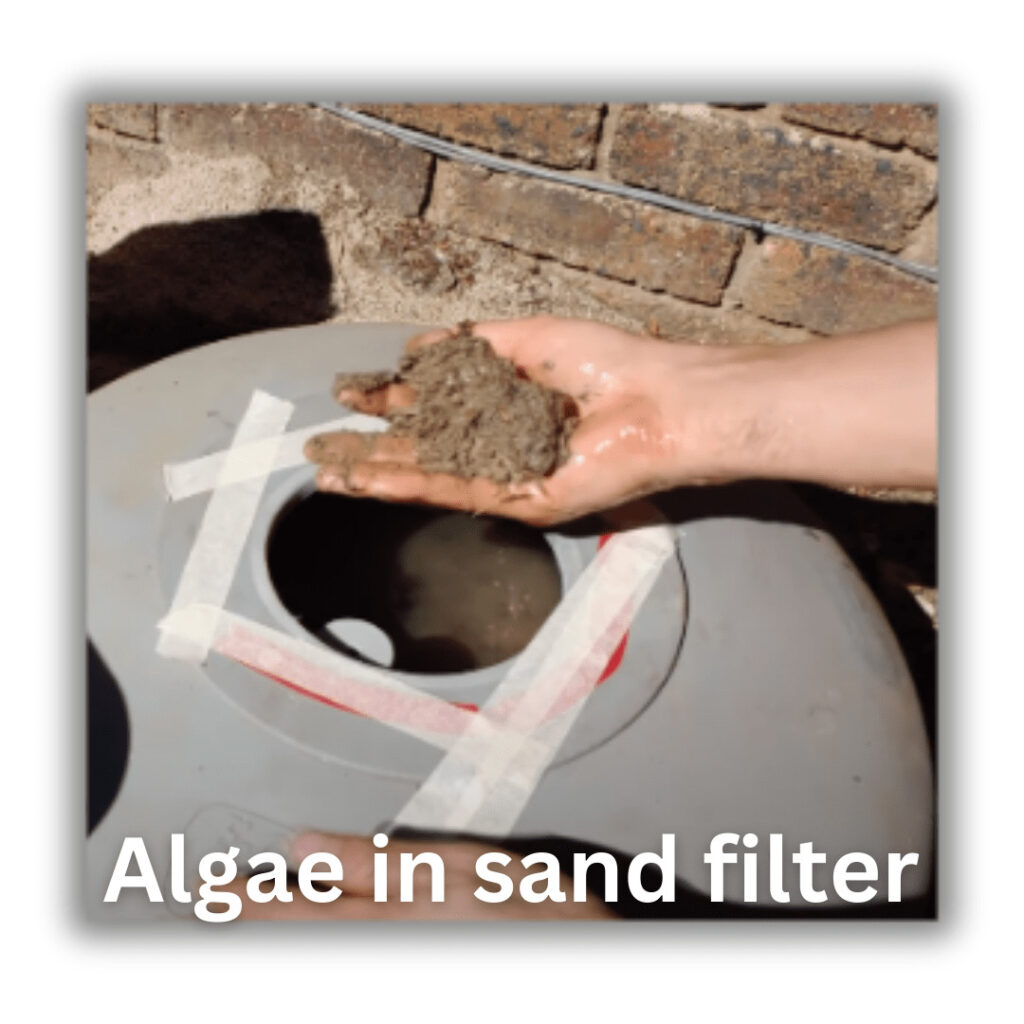
Pool pump is one of the most important parts for the circulation of water. It helps to maintain the pH level and prevent from algae attack like mustard algae. That’s why choosing a good quality pump is necessary.

Jandy Pool Pumps: 

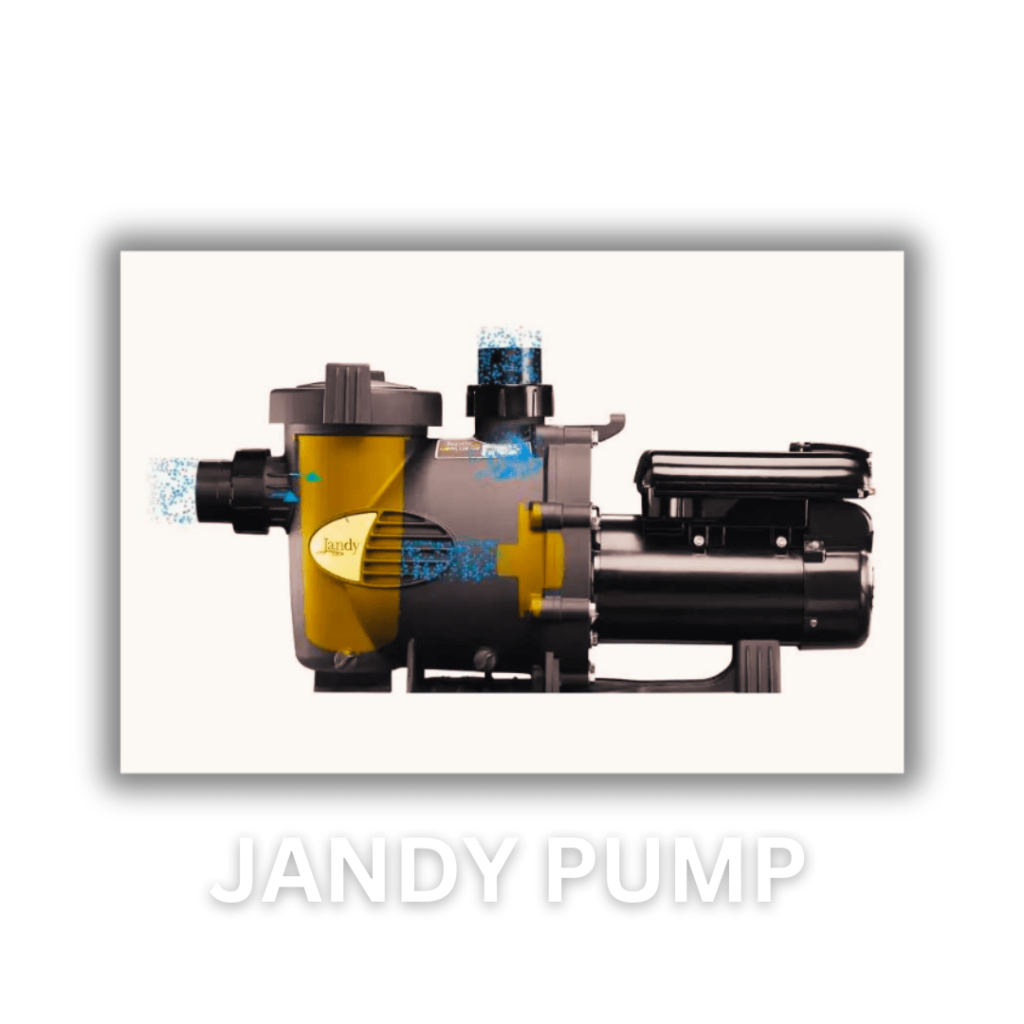
Jandy Pool Pumps: For a variety of pool sizes and purposes, Jandy offers a selection of pool pumps. The Jandy VS FloPro Variable-Speed Pump, a highlight item from them noted for its energy economy, is one of their best-selling items. The energy usage of pumps with variable speeds, like this one, can be much lower than that of single-speed pumps, which can ultimately save you money. Additionally, Jandy’s pumps include smart features that permit scheduling and remote control, as well as cutting-edge technology for quieter operation.
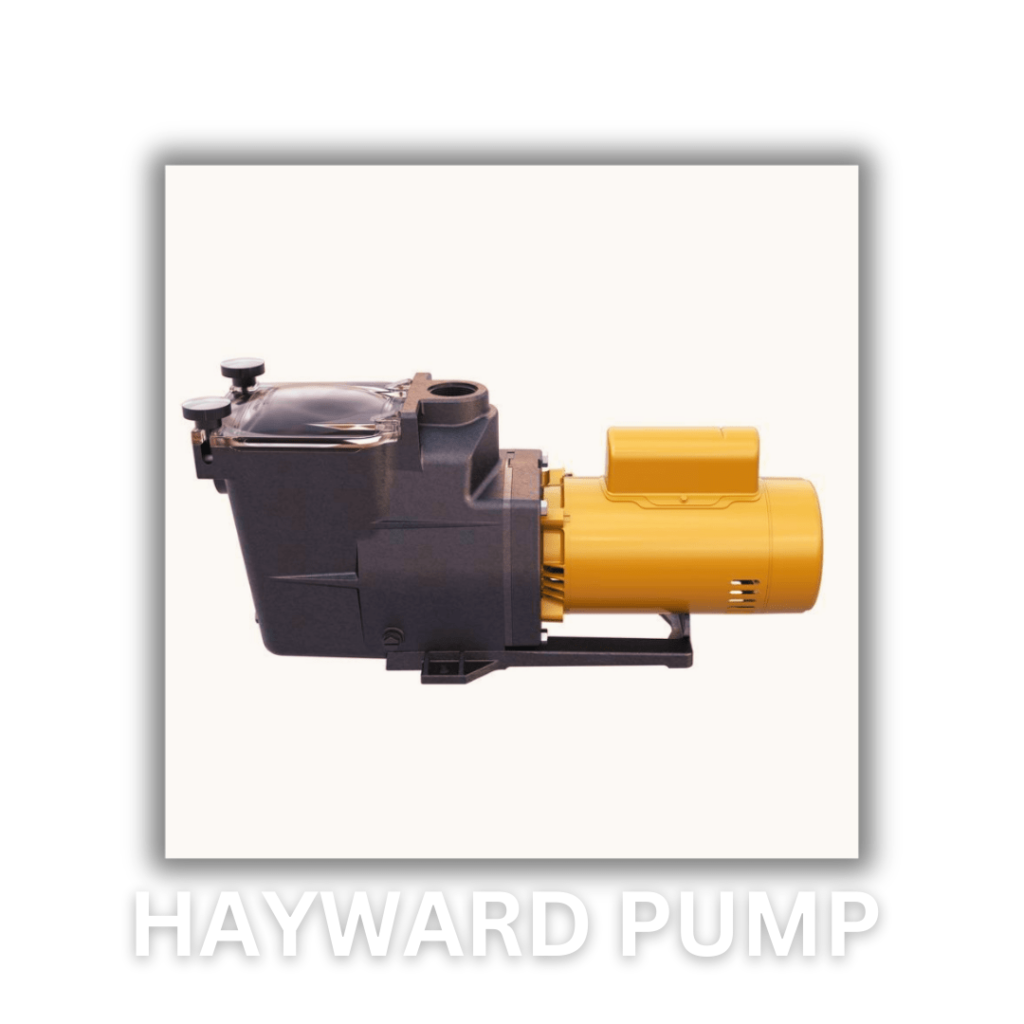
Hayward Pool Pumps:

Pool owners frequently choose the Hayward Super Pump series, which is made by the company that is renowned for producing dependable and effective pool pumps. Offering use with a range of pools and flow rates, the Super Pump is offered in several sizes.

The Hayward Super Pump VS, a variable-speed pump that is intended to be energy-efficient and quiet in operation, is only one of the variable-speed pumps that Hayward provides. The company’s pumps are renowned for their lifespan and strength.

Conclusion

Both Jandy and Hayward provide premium pool pumps, including options with variable speeds for reduced energy consumption. Your decision could be influenced by a particular model preference and suitability for your pool’s requirements.

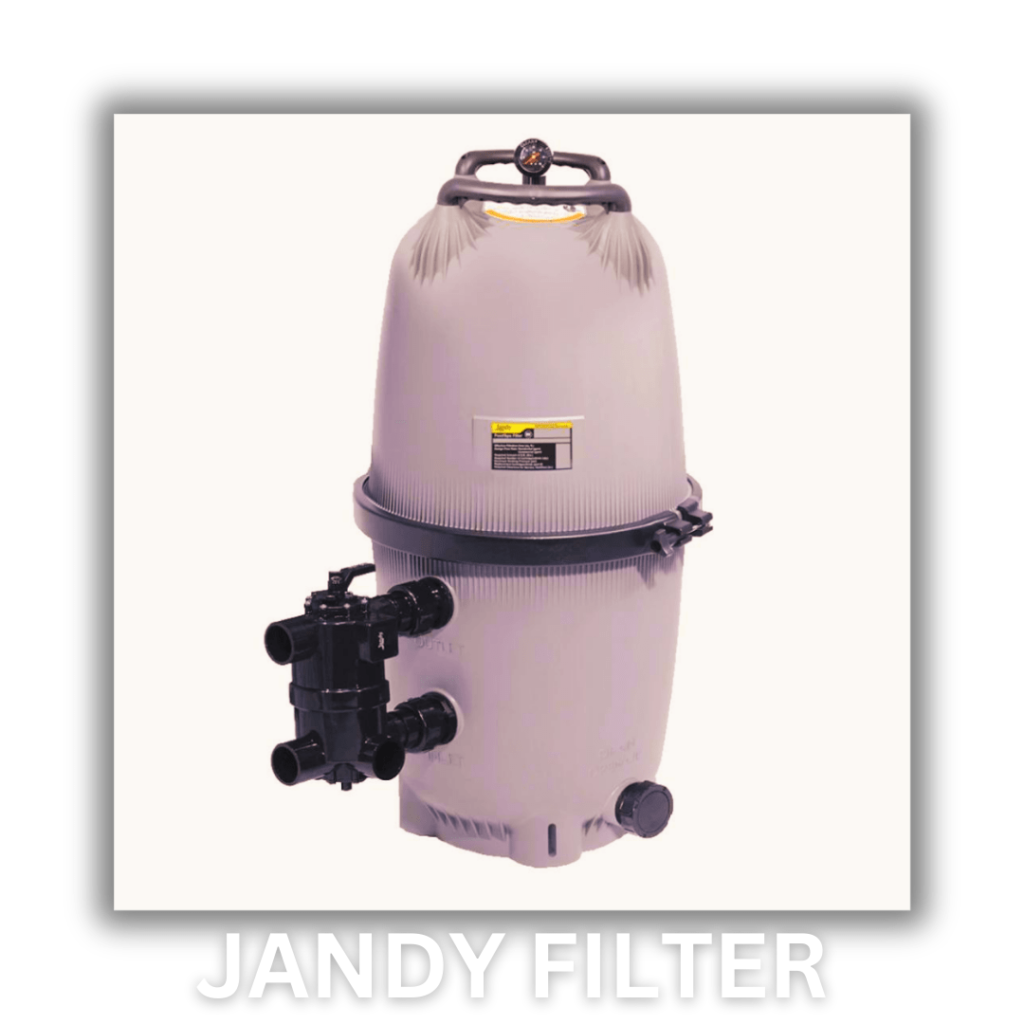
Pool Filters: Jandy vs. Hayward

Jandy Pool Filters: 

The Jandy Pro Series is a standout option among the company’s selection of pool filters. The water in the pools is kept clear and clean thanks to these filters’ effective water filtering. Diatomaceous Earth (DE) and cartridge filters from Jandy are made with simple maintenance and top performance in mind. Filtration is improved, and the filter cycle is lengthened, thanks to their exclusive ClearPro Technology.

Hayward Pool Filters: 

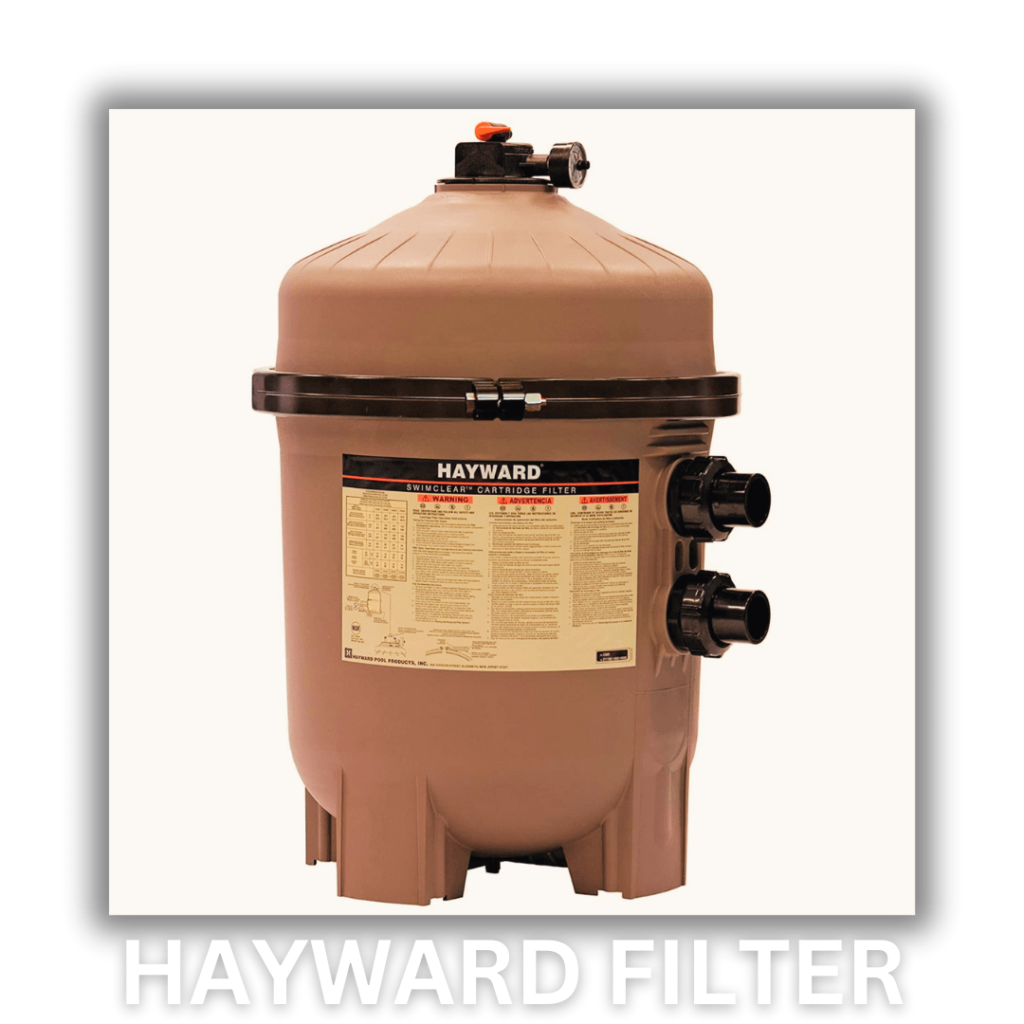
Hayward is well-known for their pool filters, and the Hayward ProGrid DE Filter stands out as a well-liked option. These DE filters are renowned for their strong construction and provide outstanding water purity. For various pool sizes and tastes, Hayward also provides cartridge and sand filters. Their filters are made to be simple to maintain, resulting in hassle-free pool maintenance.

Conclusion

Both Jandy and Hayward offer trustworthy pool filters with a range of choices to meet your pool’s requirements. Your decision may be influenced by your preferred filter type and the requirements of your particular pool.

Pool Heaters: Jandy vs. Hayward
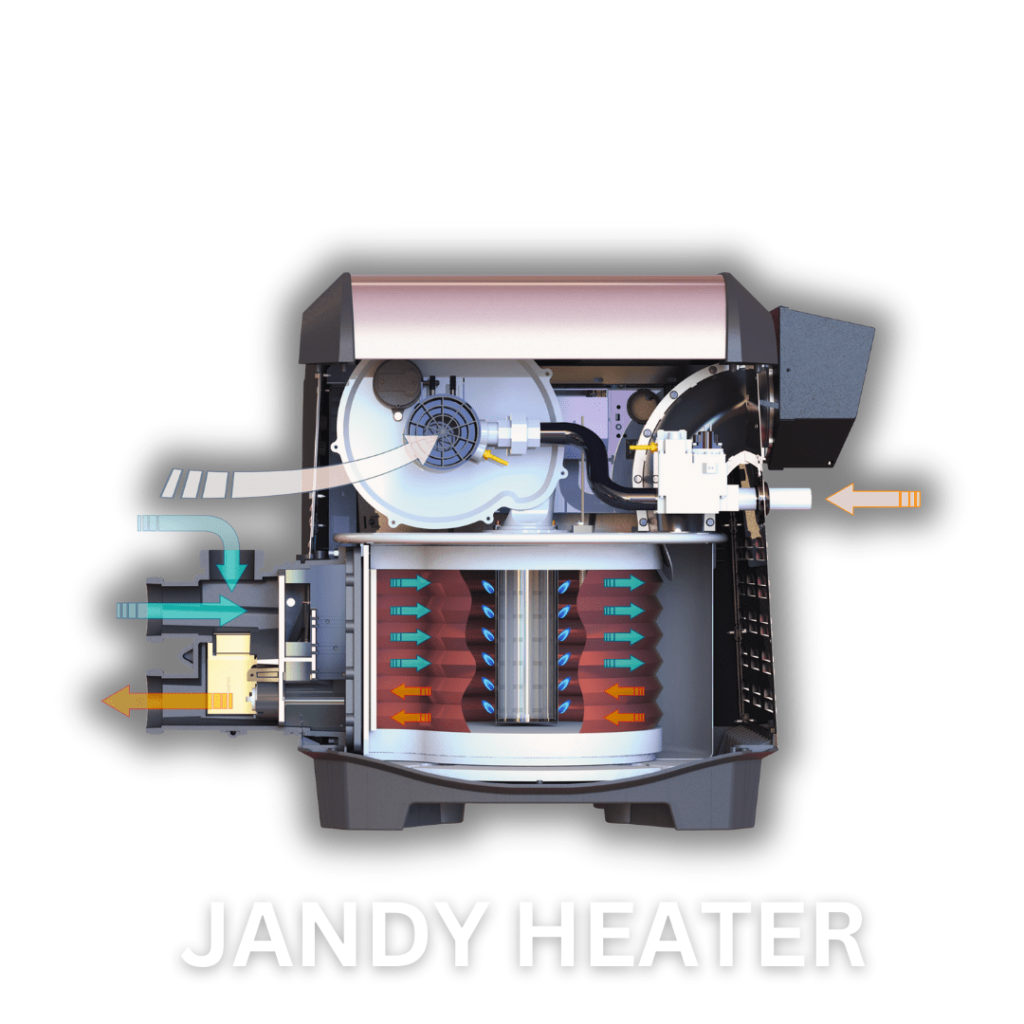
Jandy Pool Heaters:

Jandy provides a variety of pool heaters, including versions that use gas and heat pumps. Their JXi and Jandy Legacy heaters are renowned for their ability to heat up quickly and with minimal energy use. These heaters include easy-to-use temperature control interfaces and are made for extending your swimming season.

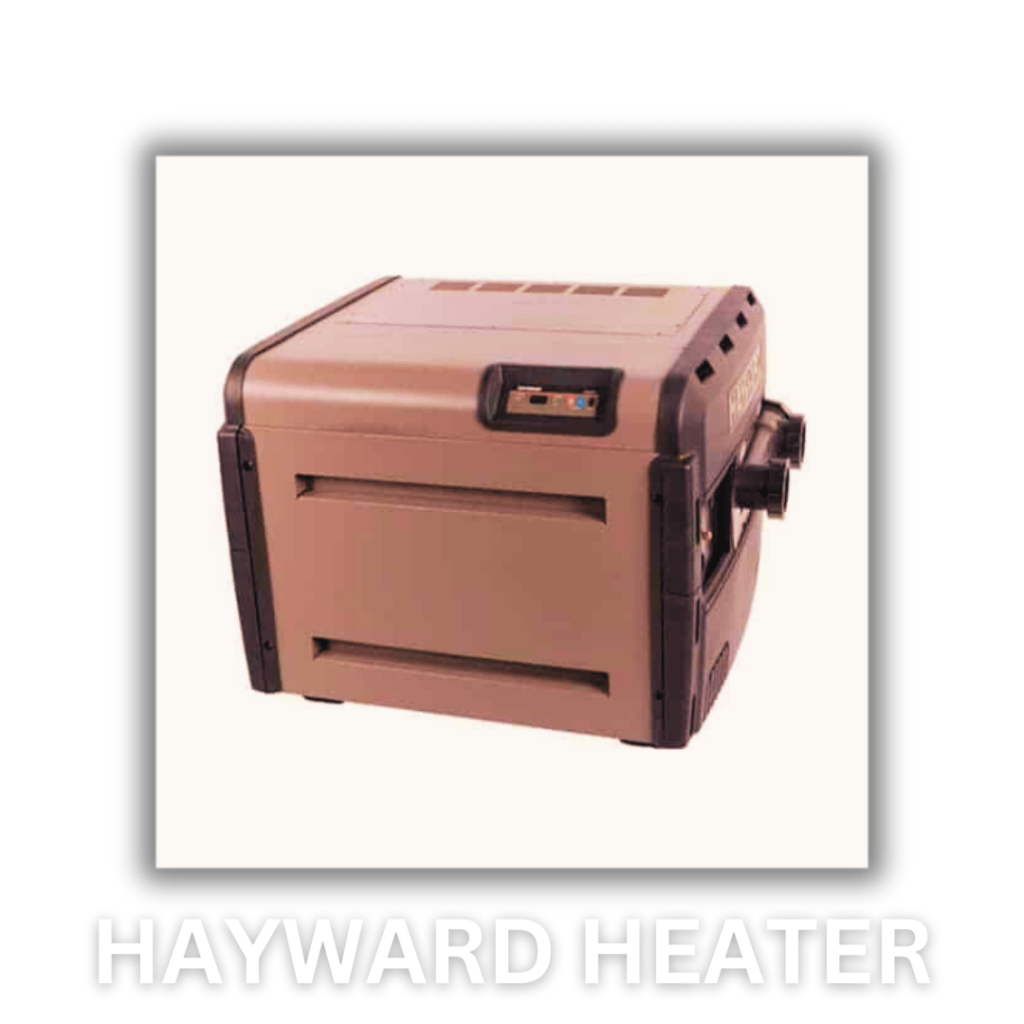
Hayward Pool Heaters:

Hayward pool heaters, such as the Hayward Universal H-Series, are famous for their performance and dependability. These heaters are made to effectively heat the water in your swimming pool and come with both gas and heat pumps variants. For increased durability and corrosion resistance, Cupro-Nickel heat exchangers are used in Hayward heaters.

Conclusion

You may extend your pool’s swimming season with great pool heaters from Jandy and Hayward. Your decision may be influenced by things like your preferred model, heating speed, and fuel type.

Pool Automation: Jandy vs. Hayward

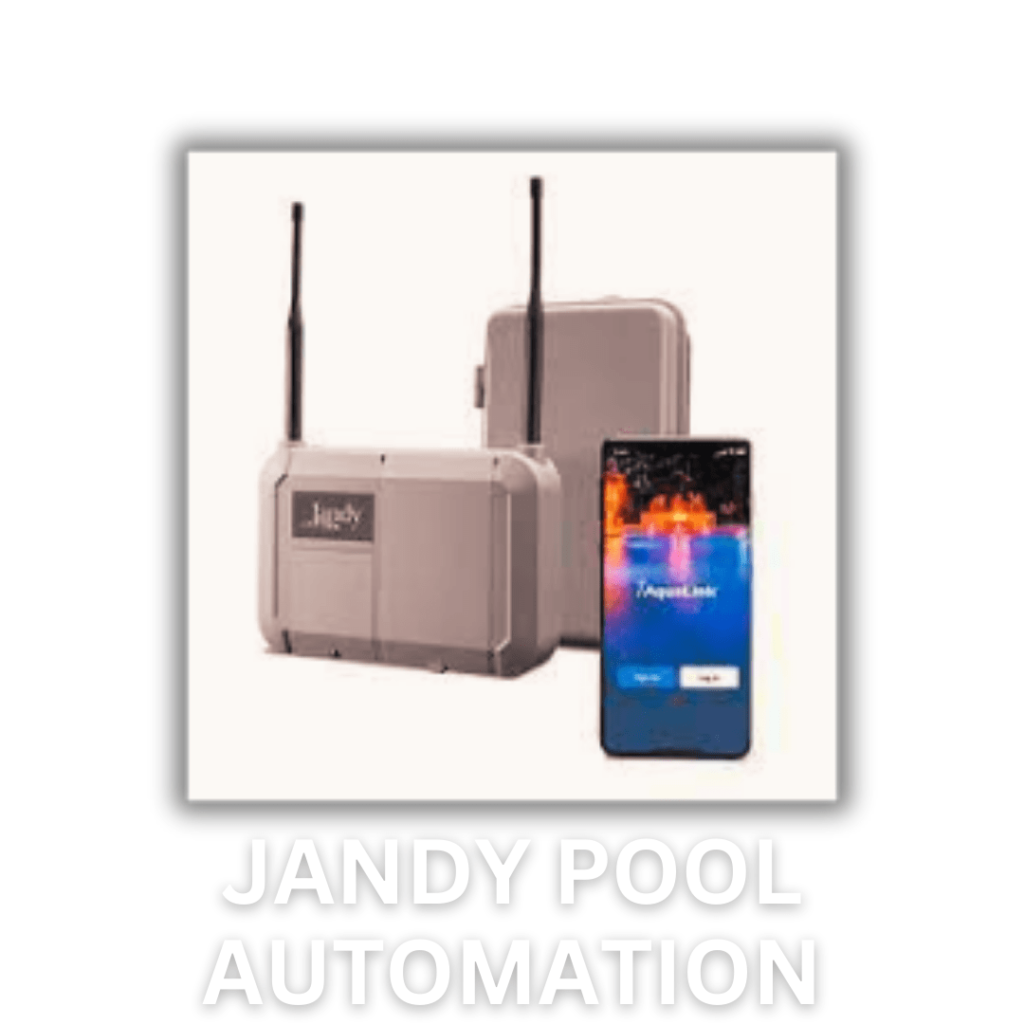
Jandy Pool Automation:

The iAquaLink and AquaLink RS systems are two examples of the cutting-edge pool automation technology offered by Jandy. Through mobile applications or web interfaces, these systems enable you to remotely manage and keep an eye on your pool’s equipment. To make managing a pool easier, they provide options like planning, water chemistry surveillance, and voice assistant compatibility.

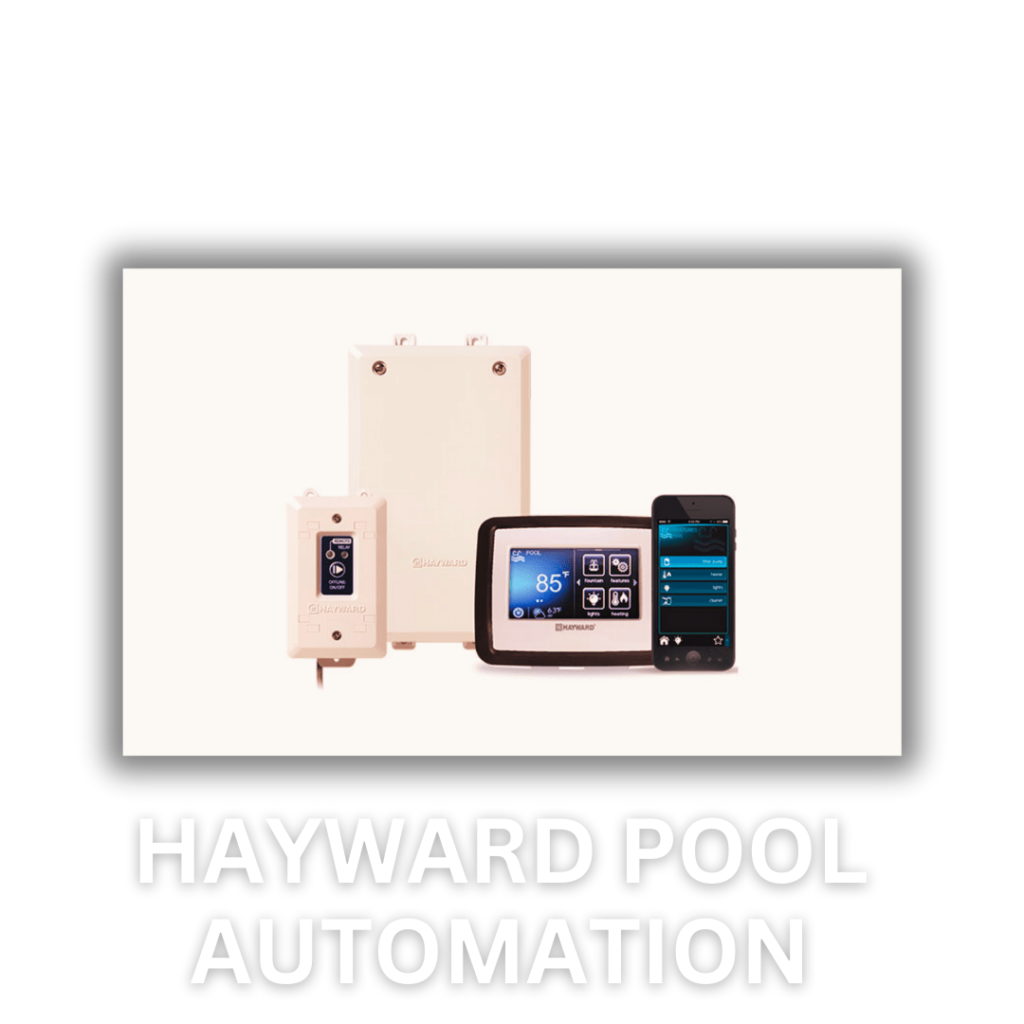
Hayward Pool Automation: 

The OmniLogic and ProLogic pool automation systems from Hayward offer simple control over your pool’s features and equipment. These systems provide user-friendly scheduling options and sophisticated scheduling capabilities. Filtering, lighting, heating, and other settings are all customizable. Additionally, they provide smartphone apps for remote access.

Conclusion

Jandy and Hayward both excel at automating swimming pools, providing simple user interfaces and remote access options. Depending on your preferences and the features you need, you may make a specific decision.

Warranty and Customer Support: Jandy vs. Hayward

Warranty and customer service from Jandy:

Jandy normally provides fair warranties on its goods, with protection ranging from one to three years for conventional pool equipment. Along with manuals for products and troubleshooting instructions, they also offer customer care via their website. However, depending on the particular product and location, warranty durations and conditions may change.

Hayward Warranty and Customer Support

Hayward is renowned for its thorough warranties, which frequently offer longer coverage periods than what is typical in the industry. Even extended guarantees of up to 10 years may be included with some Hayward equipment, such as heat exchangers. Through their website, Hayward offers customer service along with a wealth of resources for product information and troubleshooting.

Conclusion

Hayward often gives more comprehensive warranty coverage on its devices, which might give pool owners piece of mind. However, depending on the product and location, different warranty conditions can apply.

Price and Affordability: Jandy vs. Hayward

The cost of the items offered by Jandy and Hayward is comparable in terms of pricing and affordability, but it may differ according to the particular model and features. When making a choice, it is critical to take your budget into account as well as the long-term price savings linked to energy-efficient equipment.

Questions to Ask Before Making a Decision

  • Pool Size and Type Considerations: The size and type of your pool can affect the equipment you choose. Different pool varieties (such as above-ground vs. in-ground pools) may have particular needs, and larger pools may benefit from specialist equipment.
  • Energy Efficiency: If you want to reduce running expenses and environmental impact, you need to pay attention to the energy efficiency of the equipment.
  • Budget: Your financial situation will undoubtedly affect your choice. You can probably locate equipment that fits your budgetary restrictions because Jandy and Hayward both provide products in a wide price range.
  • Automation and connectivity: Take note of the possibilities for automation and compatibility provided by each brand if you want to be able to remotely operate your pool or incorporate it into a system for smart homes.
  • Local Availability and Support: Before choosing a brand, find out whether there are local dealers and service technicians who can provide it. This can have a big impact on maintenance and repairs.
  • Warranty: Make sure you are properly protected by reading the terms and coverage of the warranty for the specific piece of equipment you plan to buy.

Conclusion

Both businesses have made a name among consumers as experts in the swimming pool equipment sector, and the Jandy vs. Hayward battle has brought them face to face. Ultimately, your particular demands and tastes will determine whether you choose Jandy or Hayward. When making your decision, take into account elements like energy efficiency, filtration needs, heating options, automated features, and guarantee coverage.  Education is important before looking into buying.

For tailored advice depending on the dimensions and features of your pool, do not forget to check with certified dealers or pool professionals. The bottom line is that purchasing excellent pool equipment is crucial to providing a clean, effective, and happy swimming experience, whether you go with Jandy or Hayward.

Unlocking the Power of Solar Pool Covers: How effective are solar pool covers

How effective are solar pool covers

If you are looking for a cheap way to heat and make your pool season a little bit longer. You must have heard about solar pool cover. But the biggest question is how effective are solar pool covers. In today’s article we are going to deeply discuss solar pool cover .

So sit back, have a cup of coffee/tea and let’s get started.

What is  a solar pool  cover?

Solar pool  covers are also referred to as pool blankets, they  are transparent sheets, usually made of polyethene or other similar material, that cover your pool, that also help in raising your pool  temperature, the air bubbles absorb the heat from the sunlight and transfer it to your pool, which raises a pools temperature.

How solar covers work?

Solar covers work by transferring the heat of the sun to the pool,, as it is transparent, it allows more of sun rays to reach the pool, thus leading to the pool becoming heated, it is a very natural way of heating the pool, as it relies on solar energy, it is indeed very efficient, the air bubbles present in a solar pool cover trap the heat and keeps the heat trapped for nigh time. 

Why we need solar cover?

We need solar covers because it is a very easy way of heating the pool, as it relies on solar energy, all you have to do is have your pool in the sun, and it also stores the energy overnight, which makes it even better. it also help to reduce your pool evaporation over night and make your pool Chlorine level maintained.

Types of solar cover available in the market?

1. A transparent, bubble-textured blanket is designed to optimize the passage of sunlight and UV rays into the pool while also demonstrating its prowess in efficiently preserving heat. This unique combination of transparency and bubble texture allows for an increased influx of solar energy, making it an excellent choice for pool owners who want to harness the sun’s energy effectively to warm their pools and extend their swimming seasons.

2. For those seeking a more dynamic solution, a cover with a clear top and a dark, heat-absorbing bottom that incorporates bubbles underneath has proven to be a formidable option. The ingenious design of this cover allows it to not only capture and harness the sun’s heat but also efficiently transfer it to the pool water below. As a result, it excels in heat retention, keeping your pool comfortably warm and inviting even during cooler days or nights.

3. On the contrary, a dark, opaque, and thin solar cover without the characteristic bubbles may efficiently absorb heat from the sun, but it tends to lack the staying power when it comes to heat retention. This type of cover might be suitable for those looking for a quick warm-up without prolonged heat retention needs.

4. Moving on to a white or reflective bubble-textured blanket, we find a different set of advantages. While it may not absorb as much heat as its darker counterparts, it distinguishes itself through its remarkable ability to retain the heat it does capture. This means that even with limited heat absorption, it can keep your pool water warmer for more extended periods, reducing the need for constant heating.

5. Finally, a white or reflective thin solar cover without bubbles emerges as a distinct choice, characterized by its minimal heat absorption capacity and relatively modest heat retention. Pool owners opting for this cover may prioritize a more balanced approach to solar cover functionality, emphasizing neither excessive heat absorption nor extended heat retention.

These various options offer pool owners a range of choices, allowing them to tailor their selection to their specific needs and preferences for pool heating and maintenance.

How much durable is solar cover?

Solar pool covers commonly come in three primary materials: vinyl, polyethylene, and polypropylene, each characterized by its impermeable nature, designed to harness sunlight and curb water evaporation. However, their benefits vary considerably. 

Vinyl covers, for instance, stand out for their exceptional durability, making them less susceptible to tearing over time. 

On the other hand, polyethylene covers offer the advantage of being lighter and less rigid compared to their vinyl counterparts, although they may not match the same level of long-term resilience. 

Meanwhile, polypropylene covers shine in heat retention, effectively keeping your pool warm. However, they tend to be notably thick, which can make handling and manoeuvring them a more challenging task.

How much does a pool solar cover cost?

The cost of a solar pool cover can vary significantly depending on several factors, including the size and shape of your pool, the material of the cover, its thickness, and the brand. Here’s a general overview of the price range you can expect:

  • Basic Solar Pool Covers: These are typically the least expensive options. A basic solar pool cover for an average-sized pool (around 16′ x 32′) can cost anywhere from $20 to $100. These covers are usually made from lightweight materials and may not be as durable as more expensive options.
  • Mid-Range Solar Pool Covers: These covers offer better durability and heat retention. They are often made from higher-quality materials and come with additional features like UV resistance. Prices for mid-range covers can range from $100 to $300 or more, depending on the size and thickness.
  • Premium Solar Pool Covers: Premium solar pool covers are the most expensive but also the most effective in terms of heat retention and longevity. They are often made from thicker materials with multiple layers for added insulation. Prices for premium covers can range from $300 to $600 or more for a standard-sized pool.
  • Custom or Irregularly Shaped Pools: If you have a custom-shaped or irregularly sized pool, you may need to order a custom-made solar cover, which can be more expensive than standard sizes. The cost for these covers can vary widely, depending on the complexity of the shape and the materials used.
  • Installation and Accessories: In addition to the cost of the cover itself, you may need to consider installation costs if you’re not installing it yourself. You might also want to purchase accessories like a reel system for easier cover removal, which can add to the overall cost.

It’s important to keep in mind that while a higher-quality, more expensive solar pool cover may have a higher upfront cost, it can save you money in the long run by reducing heating costs and extending your swimming season. Additionally, the durability of the cover can affect its lifespan, so investing in a better-quality cover may pay off over time.

Pros and Cons of solar pool covers.

Certainly, here’s a more concise version:

ProsCons
Energy Efficiency: Reduces heating costs by using solar energy.Initial Cost: Higher upfront investment.
Temperature Maintenance: Keeps water warm, extends swim season.maintenance: Requires cleaning and periodic replacement.
Chemical Reduction: Reduces chemical usage and costs.Handling: Can be cumbersome, needs storage.
Environmental Benefits: Cuts carbon footprint, conserves water.Safety: Requires precautions to prevent accidents.

How fast does solar cover heat a pool?

A solar pool cover takes around 6 hours to increase the temperature by 7 degrees, but that depends on the amount of sunlight in your area, in many situations it can take less time to get to 7 degrees or in other cases it can take more to get that amount of change in temperature.

Is a solar pool cover worth it?

The answer to this question isn’t a simple yes or no, as it hinges on your specific requirements and objectives for using a solar pool cover.

If your goal is to swiftly and effortlessly heat your pool, then the answer is leaning toward no. Solar pool covers can be somewhat unwieldy to put on and take off the pool, and maintaining their cleanliness, particularly with larger covers, demands some effort.

Nevertheless, if you’re interested in reducing energy expenses and adopting an eco-friendly approach, then the answer is a resounding yes. While the initial investment can be substantial, the long-term savings are considerable because there are no ongoing operational costs.

Swim University

How effective are solar pool covers?

Indeed, solar pool covers are effective. Multiple scientific studies, at least three to be precise, have substantiated their capacity to warm swimming pools. These covers not only aid in daytime heating but also in retaining the acquired warmth during night time hours.

Furthermore, they contribute to humidity reduction and lead to tangible energy savings. However, it’s worth noting that the inconvenience of handling and maintaining these covers can offset some of the energy-saving benefits they offer.

Conclusion

In conclusion, solar pool covers offer a practical and eco-friendly solution to pool heating and maintenance. These covers harness the sun’s energy, effectively warming pool water and extending the swimming season. While the upfront cost may be a consideration, the long-term energy savings, environmental benefits, and reduced chemical usage make them a worthwhile investment.

It’s essential to choose the right type of solar pool cover to suit your specific needs, whether it’s maximizing heat retention or a more balanced approach. Additionally, proper maintenance and safety precautions are crucial to ensure their effectiveness and safe use.

Ultimately, the decision to use a solar pool cover depends on your individual preferences and priorities. If you prioritize energy efficiency, environmental responsibility, and extending your pool enjoyment, a solar pool cover is a valuable addition to your pool maintenance arsenal.

Intex Pool Legs Not Straight Leaning? Here is the Solution

Intex Pool Legs Not Straight here is the solution

Are you facing Intex Pool Legs Not Straight Problem ? don’t worry we are here to help you.

Many households looking for a cheap and practical method for enjoying the summer have started to favor Intex pools. These above-ground pools can entertain families for many hours while providing a cool retreat from the heat. 

Intex pools, however, can experience problems as time passes, one of which occurs if the pool legs fail to remain straight, just like any other pool.

In this extensive post, I will help you examine the causes of intex pool legs leaning problem, if it’s a serious problem that needs to be addressed right away, the effects of having bent legs, the best ways to put something under them for support, and other alternatives.

We’ll also give you step-by-step instructions for a long-term solution to guarantee that your Intex pool continues to be a dependable source of pleasure for years to come.

Why Intex Pool Legs Not Straight ?

It’s important to figure out why Intex pool legs may not remain straight before moving on to the alternatives. This problem can be caused by a number of reasons, and becoming knowledgeable about them may assist you avoid it in the years to come.

Unevenness of Ground

Uneven ground is among the most frequent causes of misaligned Intex pool legs. The legs may experience varying degrees of pressure if the ground underneath the pool is not perfectly level, which could cause some of them to bend or warp. This could happen for a number of reasons, including settling, natural ground shifts, or poor initial installation.

Distribution of Weight

Since Intex pools are made to retain a set volume of water, it’s important to keep the weight distribution balanced. The pool may tilt to one side if the pool’s level is uneven, putting strain on certain legs. Legs may become twisted or out of alignment as a result of time.

Poor Construction of Pool

Sometimes, the problem may have started at the pool’s initial construction. The legs may not provide enough support if they are not installed properly, which could cause bending or twisting when the pool is filled with water.

Intex Pool Legs’ age and condition

The age and general condition of the swimming pool legs itself may also play a role. Plastic materials may deteriorate or become weaker with time, increasing their propensity to bend or shatter. In addition, lower-quality materials may not be able to support the weight and pressure of the pool as well as higher-quality ones.

Now that we all  know why Intex pool’s legs might not remain in a straight line, let’s discuss some more  important things about this problem.

Is it a major issue I should solve right now?

The amount of the issue and how long it goes unattended determine how serious a misplaced pool leg is. Here are some things to think about:

Risks to Safety

Safety should be given first attention at all times. The stability of a pool may be compromised by legs that are significantly twisted or out of alignment, which could be dangerous. As a result, there may be mishaps, injuries, and pool damage.

Pool Integrity 

The integrity of the pool as a whole may be impacted by a pool with uneven legs because uneven water distribution would occur. In the long run, this can lead to structural problems, leaks, or pool liner damage.

Aesthetics of an Intex pool

Even if aesthetics might not be your top priority, a pool that is obviously tilted or out of place can be a distraction and lessen the appeal of your backyard as a whole.

The Cost Factors

The price to realign misplaced pool legs varies. Simple changes might be required in certain circumstances, while more involved repairs or replacements might be required in others. Promptly addressing the problem can frequently avoid future, more expensive repairs.

A little misalignment of an intex pool legs may not immediately be a cause for alarm, but given these circumstances, it is obvious that it should be fixed as soon as possible to avoid developing into a larger issue.

What happens if Legs are bent too much?

Let’s examine the various outcomes of doing nothing in order to emphasize how critical it is to correct bent or uneven pool legs:

An uneven water supply

Pool legs that are bent may put uneven strain on the frame and liner of the pool. This may result in an uneven water distribution throughout the pool, increasing some sections’ susceptibility to harm.

Damage to pool liners

The pool liner may be stressed by a misplaced pool leg, which could result in leaks, tears, or early deterioration. A damaged liner may be expensive and time-consuming to repair or replace.

Structural harm

In extreme situations, repeated leg misalignment might cause structural harm to the intex pool frame. This poses a serious safety risk in addition to impairing the pool’s stability.

Shorter Lifespan

These problems can shorten the lifespan of a pool that is not adequately supported. The lifespan of the Intex pool can be increased with routine maintenance and fast action.

Given these possible outcomes, it is clear that fixing damaged intex pool legs is essential for the durability, safety, or enjoyment of your pool.

Best thing to put under the legs

If you’ve discovered that the legs of your Intex pool are bending, you must add more support to stop the legs from bending further and keep the pool stable. The following are some good choices for what to place under the legs:

Patio blocks or pavers

One of the most popular ways to support pool legs is with pavers or patio blocks. They are widely accessible in renovation stores and are made of a variety of materials and sizes. How to apply them is as follows:

  • Step 1: Locate the areas wherein your intex pool legs are out of alignment.
  • Step 2: To build a solid foundation for the pavers or blocks, dig small holes under the damaged pool legs.
  • Step3. Insert the pavers or blocks into the openings, making sure they are even with the ground.
  • Step 4: Carefully place the pavers or building blocks under the pool’s legs.
  • Step 5: Check the pool legs with a level to make sure they are now perfectly straight and level.

The total weight of the intex pool is more equally distributed because to this technique’s superior stability.

Sand

Another method for leveling pool legs is sand, particularly if the ground’s unevenness is not serious enough. How to use sand is as follows:

  • step 1: Determine wherever the pool legs require assistance
  • Step 2: Clear the area beneath the impacted legs of any greenery, waste, and or uneven ground.
  • Step 3: Add a layer of sand to the areas that have been prepped.
  • Step 4: Using a level, make sure the sand remains level with the adjacent ground and dispersed evenly.

Fifth step: Carefully place the intex pool legs on the sand.

Small alignment problems may be effectively and affordably fixed with sand.

Concrete Pads

Use concrete pads if you want a more long-term fix. While this demands more work and money up front, it gives your pool legs a strong foundation. How to utilise concrete pads is as follows:

  • Step 1: Create holes beneath the damaged pool legs that are deep enough to fit the concrete pads.
  • Step 2: Prepare the concrete by mixing it as directed by the manufacturer.
  • Step 3: Fill the prepared holes with concrete, making sure to level it with the ground.
  • Step 4: Give the concrete the recommended amount of time to cure.
  • Step 5: Make sure the pool legs are level before lowering them onto the concrete pads.

Concrete pads provide stability and durability over the long run.

Foam pool pads

The use of foam pool cushions beneath above-ground pools is specifically developed for them. They aid in levelling the pool and offer insulation and cushioning. Foam pool covers can be used as follows:

  • Step 1: Identify the problematic areas of your pool legs.
  • Step 2: Make sure the affected legs are free of any dirt or uneven ground.
  • Step 3. Unroll the inflatable pool pad and trim it to the base of the pool’s size.
  • Step 4: Put the foam pad underneath the pool, making sure it’s level and supporting the crooked legs.
  • Step 5: Gently place the pool on the foam pad.

Pool pads made of foam are a great choice for insulation and light levelling.

Is there any alternative available?

The following alternatives should be taken into account if you would prefer not to add stability under the pool legs:

Changing the Water Level

In some circumstances, you may be able to solve the problem by simply modifying the amount of water in your pool. Reducing the swimming pool’s level can temporarily level the pool and lessen the strain on out-of-place legs. This is not a long-term fix, and it might not be effective for severe misalignment.

Replacement Pool Leg

You might need to repair the pool legs if they are substantially bent or damaged. To locate replacement components for your specific model of Intex pool, get in touch with the company that made it or a pool supply shop. The stability and alignment of the pool can be recovered by replacing broken legs.

Professional Assistance

It is advisable to get professional help if you are unclear of how to handle the problem or think it might be a more serious structural issue. A pool technician or contractor with above-ground pool experience may evaluate the situation and offer professional advice on the most appropriate course of action.

Step to place the pavers

Misalignment of Intex pool legs can be fixed with ease by setting patio bricks or pavers underneath. For a long-lasting solution, follow these step-by-step instructions:

Step1.Dig and level the ground 

Find Misaligned Areas Find the areas on your pool legs where they are not level or are not aligned.

Set Up the Base: Get rid of any grass, dirt, or uneven ground that may be beneath the afflicted legs.

Dig Holes: With a shovel, make shallow holes under each of the legs that were determined to be out of alignment. The holes should be dug deep enough so that any pavers or blocks will be flush with the earth.

Step 2: Set up the paving stones or blocks

Select the Proper Material: Choose patio blocks or pavers that are strong and long-lasting because they will offer the essential stability.

Check that the pavers or blocks are free and clear of any particles or dirt that could compromise their stability before setting them in place.

Step 3: Position and Level 

Place the blocks or pavers: Make sure the pavers or blocks meet level with the nearby ground before placing them in the holes you’ve dug.

Verify the levelness: Verify if the pavers or blocks are absolutely level using a level. By either adding or eliminating dirt beneath them, you can adjust as necessary

.

Step 4 :Lower the pool legs in 

Legs Lowered: Place the pool’s legs gently on the pavers or cinder blocks. Verify that each of the legs is resting firmly on the appropriate support.

Examine stability: Verify that the pool’s legs are straight and secure at this point. At this point, any errors should be fixed.

Step5: Fill and finish

To secure the pavers or blocks in place, backfill and cover any openings with dirt. Attractive gravel or landscaping supplies can be used to cover the area to give it a finished appearance.

Repeat as Necessary: Continue doing the above once all of the pool is stable and level if you have several misplaced legs.

Must check these point for the permanent solution

Take into account the following extra advice to achieve a long-lasting fix for uneven Intex pool legs:

Consistent Care

Regularly inspect the legs and overall construction of your pool. If there are any problems, take immediate action to stop them from getting worse.

Appropriate Setup

Ensure that all of the legs are level and correctly positioned during the very first pool setup. Carefully following the manufacturer’s directions can help avoid more issues.

Remove and store during the off-season.

If you reside in a region with severe winters, you might want to think about removing the pool and properly storing it during the off-season. By doing this, you may be able to avoid structural problems brought on by cold temperatures and snowfall.

Select a Secure Location

Select a stable, flat area of your yard to install your Intex pool in the beginning. Avoid any regions with steep hills or rocky terrain.

Look for Expert Assistance

Consult a qualified pool mechanic or contractor for advice and solutions if you frequently experience problems with pool leg position or suspect there may be hidden structural issues.

You can take the appropriate actions to resolve the situation by being aware of the reasons for misalignment, acknowledging the potential effects, and understanding how to properly support the pool legs. The most important thing is to make sure that the pool legs are level and secure, regardless of whether you decide to use pavers, patio blocks, concrete pads, or foam pool pads.

Future misalignment problems can also be avoided by doing routine maintenance, performing appropriate installation, and taking the pool’s position into consideration. In the end, you can keep a well-supported and simple Intex pool that offers everyone in your household unlimited summer delight with the appropriate information and a proactive attitude.

Type 5 Reviews

How to add liquid chlorine to the pool?

If you have a swimming pool, then you should know that the presence of chlorine is really important as it is a disinfectant. Chlorine is added to pools as a way of killing bacteria and germs and other things that may affect a persons health, adding chlorine to your pool is a very important thing and it must be remembered and payed attention to, knowing the right amount is very important too, as too much chlorine can lead to chlorine poisoning and several skin irritations such as rashes and more, today we are going to be discussing how to add liquid chlorine to your pool, a very vital process for a pool owner.

Difference between tablets and liquid chlorine

Does chlorine come in tablets or liquid form? Your choice of the chlorine kinds mentioned above and the method you choose to use by  adding it to your swimming pool will have a role in your decision.

Many advantages come with liquid chlorine. It costs not too much money and is easy to measure out and add to a container of water. If you want it to stay in outdoor pools, you will need to apply a different stabilizer product.

Chlorine tablets are simple to handle, store, and wipe up spills with. It can be more challenging to guarantee that chlorine levels are consistent throughout the pool with this type of chlorine, even though it is simple to apply. While the inclusion of a stabilizer in some tablets makes them useful for outdoor pools, if the pool is not properly controlled, some types of chlorine may quickly result in overstabilization.

What Benefits Can Chlorine Have for a Pool?

There are 2 3-inch chlorine tablets and a dispenser for pool chemicals nearby.

Chlorine serves as a sanitizer mostly in swimming pools. It eliminates bacteria and other harmful pathogens. Oils and organic matter that are not living in the pool can be broken down and algae can be eliminated with the help of chlorine.

At the very least, every couple of days, use a test kit to verify the chlorine level in your pool’s water. You should focus on the following levels:

The chlorine that is available to perform the sanitizing process is known as free chlorine. To get rid of germs and other impurities, the pool has to have free chlorine.

Ineffective at additional sanitizing since it is bound to pollutants, combined with chlorine. It is a sign of high combined chlorine concentrations when there is a strong chlorine odor present.

Total chlorine is the amount of free and mixed chlorine present overall, as the name suggests.

So that free chlorine can properly clean the water, the ideal range for free chlorine concentrations is from one to three parts per million (ppm). As impurities in the pool and sunshine gradually deplete free chlorine over time, you will need to frequently top off your chlorine supply to keep the level here. When the pool has received enough chlorine additions to begin building up free chlorine, this is known as the breakpoint.

Why liquid chlorine?

There are several ways of adding chlorine to your pool such as tablets and a lot  more, however liquid chlorine comes among the easier ways of adding chlorine, and for some people, it might be the only thing available to them, so according to your own requirements and what is available for you, liquid chlorine might be suitable for you.

Put safety first

Safety should be emphasized before we begin the process. Considering how powerful a chemical liquid chlorine is, it should be handled carefully. When dealing with it, make sure to always wear safety glasses and gloves. You will be shielded against chlorine splashes and touch on your skin and eyes thanks to this.

The procedure for adding

To add liquid chlorine you need certain materials and have to meet a few requirements:

  1.  Make sure there is no sunlight at the time of adding, evenings and early in the morning are suitable times for adding chlorine.
  2. Make sure you have the right type of liquid chlorine, for this you need to ask around the pool equipment suppliers.
  3. You need safety goggles and gloves, as you will be dealing with chemicals, it is very important to stay safe
  4. A measuring container for measuring dosages.

1.Chlorine levels in water

Before proceeding with adding chlorine to your pool, check the water with a chlorine testing kit and take note of how much chlorine is present, the normal chlorine levels for a swimming pool are between 1,0 and 3.0 ppm (parts per million).

2.Calculate chlorine dosage

 You can figure out the quantity of chlorine solution to add to your pool to reach the target level after you know how much chlorine is currently present in your pool. Advice on the amount to add per gallons or liter of water can be found on the product label. To assist with the calculation, a pool calculator is another tool that is commonly accessible online.

3. Set up Safety Equipment

position on protective goggles and gloves before you begin touching the liquid chlorine in order to safeguard yourself against any spillage or accidental interaction with the chemical.

4.decide on an application strategy

For introducing liquid chlorine into your pool, there are two main techniques:

Pouring: For liquid chlorine in lesser quantities, this method works well. Pour liquid chlorine around the pool evenly while pouring it gently. Avoid getting it on your skin or clothes by being careful not to splash it.

Dosing PUMP:Consider employing a treatment pump or an automatic chlorinator for larger swimming pools or when accurate dosing is necessary. The even dispersion of the liquid chlorine can be achieved by using these devices, which can release it at a controlled rate.

5. Include chlorine

If you are manually adding chlorine to the water, carefully pour the liquid into the pool while circling the edge. To ensure appropriate mixing, spread it as uniformly as you can.

If you are using a dosage pump, set it up according to the instructions provided by the manufacturer to inject chlorine at the desired pace. The size of the pool and your estimated dosage will determine this.

6. Move the Water Around

After adding the chlorine, operate your pool’s circulating system for a few hours to assist the chlorine disperse evenly throughout the water. By doing this, you can be confident that the chlorine will mix well and work as intended.

7. Hold off and retest

Wait a few hours after pouring the liquid chlorine, or adhere to the suggested time period outlined on the product packaging. Then, use your pool water analysis kit to retest the chlorine levels. To ascertain if you have attained the necessary chlorine level or whether further treatment is required, it is imperative that you complete this step. To get the optimal chlorine level, adjust the amount as needed.

8. Storing of liquid chlorine

Any unused liquid chlorine must be kept in a cold, dry, and well-ventilated location away from sunshine and other chemicals. To maintain the safety and efficiency of the chemical, it is crucial to store and dispose of it according to the manufacturer’s instructions.

9. Precautions for Safety

After handling chlorine, take off your gloves and give your hands a good, soapy wash. Furthermore, rinse any clothes that have come into contact with chlorine separately from other washing items to avoid any unwanted chemical reactions.

How Frequently Should You Chlorinate Your Pool?

a person using a Clorox sample strip to check the chemistry of their swimming pool.

Every few days, add chlorine in your pool as part of routinely checking the chemistry of the water. If the chlorine in the swimming pool needs a quick boost, you can also apply it as pool shock. After sundown, add chlorine, while making sure no one is swimming in the pool. Regarding the amount of time you should wait once introducing the chlorine before putting swimmers back in, pay close attention to the directions on the container.

Conclusion

It is simple to add liquid chlorine to a swimming pool, which keeps the water clean and secure. You and your family may maintain a relaxing and enjoyable swimming experience by adhering to these safety considerations and steps. Always refer to the individual product directions and instructions for the solution of chlorine you are using because brand-specific concentration and dosing recommendations may differ. you save both the environment and the public’s safety by making sure you abide by any local laws governing the usage and removal of pool chemicals.

Algae in Sand Filter ? Here’s How to Remove it

Algae in Sand Filter

I know you are getting confused about how can algae in sand filter. don’t worry that why i am here to help you.

A homeowner’s fantasy comes true with a beautiful, crystal-clear swimming pool. The growth of algae in the water of the pool and, more unexpectedly, inside the  swimming pool’s sand filter is a typical annoyance that can transform the ideal situation into a nightmare.

Algae is scary as it can lead to several different health problems and infections in some cases. In this detailed guide, we will go into the world of algae, where it comes from, the purpose of a sand filter, the way algae can get inside of it, detection techniques, and, most importantly, how you can effectively eliminate and avoid algae from damaging your sand filter.

Where does algae come from?

Algae, the green threat to swimming pools, can come from a number of places. Effective prevention and treatment depend on an understanding of its causes.

  • Airborne Spores: The algae spores can be transported by the wind and dropped into your swimming pool. From nearby foliage, dust, or even rainwater, these minuscule, hardy spores can make their way into the water of your pool.
  • Contaminated pool water: If you’re adding water from a different source without using sufficient filtration or chlorination, it can be contaminated with algal spores. Algae development might also result from neglected pool upkeep.
  • Swimmers: Both people and animals with fur on them or in their swimsuits might unintentionally introduce algae to the pool. If the circumstances are appropriate, a tiny amount can cause an algal bloom, as algae grows rapidly and could form colonies from even a little bit of presence.

A Sand Filter’s Purpose

Let’s first examine the issue of sand filters’ principal purpose before exploring the problem of algae.

  • Filtration: By circulating pool water over a bed of sand, sand filters are intended to remove contaminants. As a result of the sand’s ability to trap trash, particles, and bacteria, thereby including algae, your pool’s water is left crystal-clear and clean.
  • Circulation: Sand filters are essential for maintaining the water’s circulation in pools. To disperse pool chemicals uniformly and avoid pockets of stagnation where algae might flourish, proper circulation is crucial.

How can algae travel pool to sand filter

Algae and other debris are caught in the sand as the pool water flows through the sand filter, but the filtered pool water is released. Algae may soon start to build in your filter if you put off replacing the sand for too long.

How to identify that it is sand or algae?

You can tell if it is sand or algae simply by the mere concept of observation. If it feels false, sticky and reacts weirdly such as showing cloudiness when you interact with it, it is probably algae, or to prove it, you could put it in a water bucket to see if it grows.

Chlorine levels will be mostly affected within a short period of time, the short period of time being overnight for a reference. It might feel really slimy and it could be really  annoying to pick it up. 

Visual Inspection

A visual inspection is the simplest method of determining the presence of sand. When the filter tank is opened, the sand particles inside are visible as granular material. On the other hand, the presence of algae in the filter is often indicated by a sticky or greenish substance that adheres to the sand or other filter elements.

Texture

When you reach into the pores of the filter and feel the substance, sand will feel coarse and rough to the touch, similar to tiny grains of sandpaper. Algae, on the opposite hand, will feel sticky and slippery and frequently leave a green film on your fingers.

Color

Sand often has a beige, brown, or white tone, and it will keep this color. However, depending on the species and stage of growth, algae can display a range of colors, including green as well as brown hues.

Water Clarity

Check the clarity of the water in your pool. If the water in your pool seems clean but you see what appears to be algae growing inside the filter, it is probably algae. It may be a sign of sand erosion or problems with the sand bed if the water is murky or opaque and particles are going past the filter.

Water Testing

Run water testing to look for chemistry imbalances in the pool. When it comes to sand concerns, mechanical filter faults are usually the cause, whereas inappropriate pH, insufficient sanitizer levels, or excessive phosphates are frequently related with algae growth, signs of low chlorine levels is also proof  for algae growth as algae makes  the chlorine levels drop rapidly, it can drop it by a huge margin just overnight.

You may determine with accuracy whether sand or algae is the source of problems in the swimming pool’s sand filter and then take the necessary action to address the situation by taking into account certain observant tactile, and water quality signs.

How to Easily Remove Algae from Sand Filter?

  1. Clean the sand filter for 3 to 5 minutes to make sure that all the physically huge debris/chunk of algae is removed.
  2. Turn off the pool  pump and open the lid, and start adding the filter cleaner to the pool  pump.
  3. Have a bucket of clean water with you to pour into the pump, to make  sure that there is no more algae fungi growth in the water. 
  4. Turn the pump off once when the cleaner and the clean water without algae have entered the pump. 
  5. Don’t use the pool for around 12 hours and let the filter soak.
  6. Backwash the pump and that is all you need to clean your filter.
The Pool Team

Should I change sand from the sand filter?

You should change the sand filter in case of algae growth, this is very important to make sure there are no leftover algae in the filter, and apart from that it is necessary to change sand in your sand filter every 3 years to prevent several different issues, but  if you get a case of  algae growth then it is necessary to change the sand filter, the sand is not safe from getting affected from algae, even if there is no visible proof that the sand got affected, there might be little algae hidden in it, and even little amounts of algae are enough to grow a colony.

How to prevent algae from coming back in the sand filter?

A cautious approach to maintaining your pool and water chemistry is needed to stop algae from re-colonizing the water in your pool’s sand filter system. A crucial sentence addressing prevention measures for algae can be found below:

Maintaining adequate water chemistry is essential to avoiding a resurgence of algae in sand filter system of your swimming pool. To produce a setting less favorable for the formation of algae, regularly check and balance the pH, alkalinity, and sanitizer levels in the pool. Algae are killed and inhibited by enough sanitizer levels, which are typically made of chlorine. 

As a preventative step, you should also think about adding algaecide for pool clarifiers, particularly in the warmer months when algae grows more quickly. To clear away debris and avoid jams that can promote algae growth, the sand filter needs to be backwashed and cleaned regularly.

To reduce the entrance of organic debris that encourages the growth of algae, maintain pool surfaces, skimming devices, and baskets clean. Additionally, try to keep the pool out of the sun as much as possible because algae love bright, sunny environments. 

Finally, keeping the water flowing through the pool consistently and thoroughly will prevent algae buildup in the filter itself and all around the pool. You can take pleasure in a swimming pool that is crystal clear and free of algae by carefully adhering to these preventive steps.

Conclusion

With the knowledge you receive from this comprehensive tutorial, you can successfully address the issue of algae in the water in your pool’s sand filter, although algae growth is a really annoying thing to deal with, it is also not that hard to get rid of and the precautions can be taken on a daily basis,

if algae growth isn’t taken as a serious factor then it can lead to some terrible problems with your pooling experience, and that may include health issues and skin diseases such as rashes as it kills chlorine which is used a disinfectant and that would cause the rise of pathogens that could lead to a lot of skin irritation. And now you have enough knowledge to know if your pool  has algae and what to do to treat it.

You can have an algae-free pool all year long if you are aware of the sources of the growth, how sand filters work, where the algae enters the pool, how to identify it, how to remove it, when to replenish the sand, and how to prevent it. Bid farewell to cloudy water and welcome to stress-free pool enjoyment!

What is the best things to put under above ground pool legs?

best things to put under above ground pool legs

If you are here then you might be facing a problem that your intex pool legs are sinking into the ground and you are looking for the right solution. Here  I’m gonna share some best things to put under above ground pool legs.

Intex pools sometimes become stressful to set up because of not having a proper and solid surface to set up. But there are many solutions for this issue like putting some strong material under above ground pool legs.

In this article i am sharing some experience which i faced during the installation of intex pool. Also share some important tips that help you alot.

If you are confused where you can buy these materials and how many blocks you need to put under the pool legs ? i also cover this point. 

So sit back, grab your coffee and let’s dive into it.

Why should we place them under the pool legs?

After some time in the new pool, due to the non-solidity of the ground and repeated water falling on it, the ground of the leg of the pool does not remain solid and the leg of the pool starts sinking into the ground, due to which the pool can be damaged in many ways. for deeply details you can visit our post which is about Intex Pool Legs Not Straight

Best things to put under above ground pool legs.

In my opinion Thick pavers are the best thing to put under above ground pool legs. Pavers are made from a mixture of cements, sand and aggregates. That provides a hard surface helps to level out your pool and prevent sinking . it equally distributes the weight of the pool by providing extra support for the pool legs.

This can also help to protect the pool liner layer from rubbing. If your pool legs are not sinking too much you can also use pavers alternatives like wooden blocks, bricks or foam pads but remember that these alternatives come with some pros and cons.

Thick Pavers/Trailer Pads (Best & Effective)

Pavers are also known as Trailer pads . These Trailer pads are manufactured for the use under the trailer wheels. These pads easily handle tons of weight and can be handled any season.

These pavers are a little bit abrasive so I would prefer to add another layer on the top of the pavers. You can use a camping mat or Gorilla pad.

Keep in mind that the paver should always be used on level ground. If the area of ​​your pool is not level, then first level it.

Wooden Blocks/Planks (Second Favorite)

Pressure treated wood blocks are the second best things to put under above ground pool legs. Pressure treated wood blocks were earlier used under the train tracks and they could easily handle the weight of the train. Similarly, it will easily bear the weight of the pool.

Here you need to pay attention to the size and thickness of the pressure wood block. The work should be 4 inches thick and 1 foot long and wide.

The most important is the quality of the wood, if you use such types of wood that become softer after some time, such as cedar and pine wood, all these types of wood will not support your pool. Instead, you should use harder wood such as mahogany and teak, all of which are very strong and long-lasting.

Bricks

You must have seen many videos on youtube where you will find videos using bricks. This method is suitable for temporary use but if you want to live without any problem for a long time then use pavers only because the bricks start breaking after some time due to the weight of the pool.

If you use sealed bricks then it will be better as they are strong and weatherproof and can last even in summer without any issue.

Sand

If you have kids in your home who tend to spill water while taking a dip in the pool, then the sand pad is not for you as it absorbs moisture which can cause fungal, bacterial and algae to grow on the bottom of your pool legs and make your pool leg base weaker.

If you live in a rainy area, you should avoid using sand at all as there is a chance that the sand will slowly wash away from the bottom of the pool leg with the flow of water. Some people use gravel too, but that can put a hole in your pool.

I don’t advise anyone to use sand under the pool leg, yes you can definitely use it on top of the pavers as an extra layer to get additional cushions.

Foam Pads (If You’re on Concrete)

If your pool is already on a concrete surface you don’t need any kind of pavers, wood blocks and sand, but you want to make sure for stability you can use foam pads underneath your pool legs.

These pads are made for providing extra cushioning to your pool and prevent your pool from any scratches.

How to Place Concrete Pavers or Wood Under Your Pool Legs ?

If you want to install pavers or any wood under pool legs i would suggest you should contact your know professional guy who is expert in installing pavers under pool legs.

However I’m gonna share with you some important Methods that help you to install easily and at the end you will feel like a pro. Just remember that you have to make sure that your pool is level. I also share some steps that help you to level the pool.

If the Pool is Level

If your pool is in level you have an advantage that you don’t need to dig into ground. Just place the pavers underneath pool legs.

  • Method 1

This method is only for those people who have not yet installed their pool. The first thing they have to do is guess where the leg of their pool will be and slightly dig down.  If you find any hole fill it with some concrete or gravel then place Pavers or Wooden blocks in the groove. 

Just make sure that both are level and sturdy because if they aren’t, it will damage the pool lining. After completing the whole process you can use sand for extra cushioning .

  • Method 2

This method is for those who have had issues with pool legs sinking after pool installation. The safest way in this situation is to completely empty the pool so that there is no chance of any kind of accident.

After this, you have to use the floor jack to lift the legs of the pool, taking care that before lifting the floor jack, it is in a solid place.

You have to use some wood plank to lift the pool which will be fixed to the floor jack and the other end will be in the T section of the leg of the pool.

Then you have to lift slowly, until you can place the paver under the legs. After applying the paver, release the pressure of the floor jack.

If the Pool not is Level

For leveling the pool you have to do more work before installing pool legs. Here I am embedding a video that helps you alot for leveling the pool ground.

Try This DIY

After completing this process, follow method 1 .

What size of Pavers should we use?

There are lots of options available in the market but 1 ft x1 ft  with 4 to 5 inch thickness is the ideal size you can use under your pool legs. 

It also depends on your pool leg size. So before ordering pavers make sure to measure the leg size.

What are the Benefits of Placing Blocks/Pavers Under Your Pool Legs?

  • There are many benefits of pavers some of the benefits are:
  • It protects your Pool Liner from being damaged by the pool legs.
  • Pavers provide extra support for the pool legs and keep them from sinking.
  • It helps to prevent the pool legs bending.
  • Provide more stability and help to level out the pool.

Where Can You Buy it?

This totally depends on two things. The first one is what kind of pool you want to use under your pool legs and the second one your locality .

As I already suggest, pavers are best for the long term. You must go with it because it’s available in almost every supermarket like Walmart , hardware shop . You can also contact landscaping companies for quotes . but some people who live in rural areas can also order via amazon.

How Much Does it Cost?

It depends on what kind of brand and material you want to use under above ground pool legs.

For the pavers it costs you around 1$ to 15$ per square foot .

How Many Blocks Do You Need?

It depends on your pool size, if the bigger the pool size, the more leg support it will have, so accordingly you will need more blocks.

If your pool is already installed, then you can order blocks according to the legs that are sinking.

Related Interior Pool Finish Resources